Thursday, December 19, 2013

Crockpot Sesame Chicken


Crockpot Sesame Chicken

2 pounds bonless skinless chicken breasts
1/2 cup honey
1/4 cup soy sauce (gluten free)
2 Tbsp minced onion
2 Tbsp ketchup
1 Tbsp oil
1/2 tsp garlic powder
2 tsp cornstarch dissolved in 3 Tbsp water
sesame seeds

Put whole chicken breasts into the crockpot.  Combine the honey, soy sauce, onion, ketchup, oil and garlic.  Mix together and then pour over the chicken.  Cook on low for 3-4 hours.  Or on high for 1 1/2-2 1/2 hours, or until the chicken is cooked through.
Before serving, remove the chicken and cut into cubes.  Pour the sauce into a hot pan, and add the cornstarch mix to thicken the sauce.  Toss the cubed chicken into the thickened sauce and serve.
Sprinkle with sesame seeds and serve with rice!


Click here to see all my other gluten & dairy free recipes.


I found this recipe on facebook.


Wednesday, December 18, 2013

Chicken Fajita Stir-Fry


Chicken Fajita Stir-Fry

1-2 lbs. chicken breast
chili powder
garlic powder
minced garlic
cumin
lawry's
salt & pepper
1 red pepper
1 green pepper
1 yellow onion
rice

Cut the chicken in long strips.  Cook with water to keep moist, and your own amounts of the seasonings, chili powder, garlic powder, cumin, lawry's, salt and pepper.  Slice the onion and peppers into long strips.  Add once the chicken is cooked through.  Toss in 1 tsp minced garlic.  Stir-fry until the veggies are tender.
Cook rice adding cilantro and lime, and serve on the side.

Enjoy!

Click here to see all my other gluten & dairy free recipes.


Chicken Corn Chowder GFDF

I need to be more willing to find a way to make things I used to eat, gluten and dairy free.

Here's one.....


Chicken Corn Chowder

chicken
2 cans creamed corn
4-6 medium potatoes
2 cups almond milk
1 Tbsp coconut oil
1 onion
salt, pepper, cayenne, cumin

Melt the coconut oil in a pan, with the chopped onions.  Cook over low heat until tender.  Cut 4-5 cups of cubed potatoes, and add to the onion mixture.  Stir in the corn, milk and seasonings.  Let simmer until the potatoes are tender.  Could put in the crockpot all day to soften the potatoes, and blend the flavors together.
I also cooked chicken and diced it up fine to add to the soup.


Click here to see all my other gluten & dairy free recipes.


Tuesday, December 17, 2013

Ham & Scalloped Potatoes GFDF

{no picture} forgot to take I guess. :)

I realized that the cream of mushroom was just milk thickened with chopped up mushrooms.  Since I don't really like mushrooms I may as well just use milk.  Since I can't have regular milk I just use almond milk.  Easy enough, right?!

Ham & Scalloped Potatoes
2-3 thick slices of ham cubed
bacon bits
1 onion finely chopped
salt, pepper, cumin
2 cups almond milk
8-10 medium potatoes

Cube ham, peel and slice the potatoes.  Mix all ingredients in your crockpot and let sit on low for 4-6 hours.  Stir occasionally.  Don't over cook or the potatoes will become mushy.  Still tastes good but doesn't look as pretty.

Click here to see all my other gluten & dairy free recipes.

Enjoy!


Wednesday, December 4, 2013

Homemade Taquitos


Rice Tortilla Shells
refried beans
hamburger
oil
any other taco toppings you like

Put a thin layer of refried beans over your taco shell.  After the hamburger is cooked and seasoned chop finely.  Put a thin layer of hamburger over the beans.  Roll the shell as tightly as possible.  Heat a shallow  pan with oil.  Once oil is very hot, place the "taquito" in the oil to crisp the shell.

*It's possible you might need a toothpick to help hold the shape while frying.  If so remember to take this out before serving. :)

Top with any of your favorite taco toppings!

Obviously if you are not gluten and dairy free, you can use a standard flour shell for this.
I suggest the rice shell because the corn shells fall apart too easily.  But next time I might try to find a way to soften them up so they don't fall apart.  I'll let you know when I find out.  In the mean time if you have already done it let me know!

Enjoy!

Click here to see all my other gluten & dairy free recipes.


Tuesday, November 19, 2013

Oven Baked Fajita

My husband may not be a huge spicy fan, but this must have had a little kick to it because he barely took a bite and coughed over the spicy.  Ha.  I enjoyed it but if you don't like that much spice you might want to tone down the amount of chili powder you put in.

{Sorry I guess I forgot a picture}

Oven Baked Fajita
1 lb chicken, cut into strips
2 Tbsp vegetable oil
2 tsp chili powder
1 1/2 tsp cumin
1/2 tsp garlic powder
1/2 tsp dried oregano
1/3 tsp seasoned salt
1 (15oz) can diced tomatoes with chilies
1 medium onion
1/2 red pepper, cut into strips
1/2 green pepper, cut into strips

Preheat the oven to 400 degrees.  Put the chicken strips in a greased 13x9 baking pan.  In a small bowl combine the oil and spices.  Drizzle over the chicken and toss the chicken to coat.  Next add the tomatoes, peppers and onions and stir to combine.
Bake uncovered for 20-25 minutes.

Click here to see all my Gluten and Diary free recipes.


Recipe Source: Quick and Easy Healthy Eating (Facebook page)


Monday, November 18, 2013

As I hold this weeping child.....

When you're 6, and you've been in foster care for almost a year....

Every morning I hold a weeping child.  Mornings and evenings are definitely the hardest as they are tired, and less in control of their emotions.

As I hold this weeping child,
I pray for her.

As I hold this weeping child,
I gently talk with her reasurring her in the now, that we are here for her.  It's all I can guarantee.

As I hold this weeping child,
I sing to her.

As I hold this weeping child,
I read Bible verses to her.

As I hold this weeping child,
my heart breaks for her.

I can be the "best" interim-mother in the world to her, but yet I hold a weeping child every morning.
Weeping for what she's lost.  A loss that feels deeper and bigger to her every day.


Loss is a rough ride, no matter what's been lost, or for how long.

Pray for someone else this morning who's lost someone dear to them.  Be an encouragement to them today.


Saturday, November 2, 2013

Burrito Bowl

Do you like Panchero's? This is one of my favorite restaurants.  Unfortunately we do not have on in our own town.  Actually the closest one is 55 minutes away at least.  So I have to settle for it every once in a while, or whenever we visit family in Iowa.   Well, I made my own version of their burrito bowl, and I'd have to say it was pretty stinkin' good!


Try it for yourself.

brown rice
1 lime
cilantro
black or pinto beans
chicken
pepper, salt, chili powder, lawry's
green pepper
red pepper
onion
minced garlic
guacamole
lettuce
salsa


Cook the rice according to package directions.  I used 4 cups of instant brown rice.  After it had set, I add 1/2 cup chopped cilantro and 1/2 a lime and simmered for 2 more minutes.


In another pan cook the sliced peppers, and onion with 2 tsp minced garlic and salt and pepper and olive oil.  Set aside once softened and cooked through.


Cook the chicken with seasonings to your taste.  I chose, cumin, chili powder, salt, pepper and garlic powder.  Continue to add water to keep the chicken moist.

Add any other type of taco toppings that would normally choose and enjoy!


Click here to see all my gluten free dairy free recipes so far.


Friday, November 1, 2013

Thankful Tree Craft

I bought this big roll of paper at IKEA, and we have found numerous things to do with it.  It is great!

Given the season we are thinking about Thanksgiving and all the things we can and should be thankful for.  So why not write some of those things down for others to see?!

Thankful Tree


Items you will need to make a similar Thankful Tree Craft.
Large Sheet of paper
Colorful paper
scissors
glue
paint
paint brush
water
pen

Cut as large of a sheet of paper as you would like to make your tree.  Draw a tree with pencil, and paint it brown.  We added water to a little paint to make it more like water coloring.  While that is drying cut out some leaf shapes.  All different colors.  Next write down the things you are thankful for on them.   Glue them to your tree and display it for all to see!


Enjoy!

Happy Crafting!


Wednesday, October 30, 2013

English posters

I've decided we need more visuals in our school area.

Especially concerning English.

Noun, verb, adjective, adverb, pronoun....my kids are getting a little mixed up.

So here's some things I made for our walls, I'm sure I'll edit them as time goes by, but we are going to work with it for now.


Download them here.


Tuesday, October 29, 2013

Why we don't....

Why we don't support Oct 31 as anything other than another day in the year.


I feel as though there are many areas of compromise in this world.  And it's not a good sort of compromise.

Things like,

It's ok to lie as long as you are protecting yourself.
But the Bible says,
Proverbs 12:22
The Lord detests lying lips, but he delights in men who are truthful.


You don't have to be kind to that person anymore if they've hurt you deeply.
But the Bible says,
Colosians 3:13
Bear with each other and fortive whatever grievance you may have against one another.  Forgive as the Lord forgave you.


It's ok to worship the Devil, as long as you do it in a funny dressing-up sort of way.
Now maybe they don't say this exact sentence...but this is the desired subliminal message.
But the Bible says,
Deuteronomy 6:4-9
Hear, o Israel: The Lord our God, the Lord is one.  Love the Lord your God with all your heart and with all your soul and with all your strength.  These commandments that I give you today are to be upon your hears.  Impess them on your children.  Talk about them when you sit at home and when you walk along the road, when you lie down and when you get up.  Tie them as symbols on your hands and bind them on your foreheads.  Write them on the doorframes of your houses and on your gates.


Verse 7 says Impress them on your children.

What are you impressing on your children?  I want to try my hardest to not impress on my children that it's ok to go along with others on everything, as long as or just because it's fun.  We also need to look at the reason and desire behind doing or wanting to do that thing, and who ultimately is being glorified through our actions.  I want to choose to impress the things that God is asking of me.  Love the Lord your God with all your heart and soul and strength, and impress those thoughts on my children at all times of the day and every day of the year.
If we are really doing that, we will not allow room for the compromise to take place.


More recently with my foster daughter, we mentioned that we are going to do something more wholesome as a family on that day instead.  Recently she said back to me, I'm glad we're not going out for Halloween, because when I was littler (last year at her other house) I did that, and the teenagers were dressed up really bad, and it scared me and gave me bad dreams.


P.S.  This is my opinion.  This in no way means that I think everyone needs to follow.  I am responsible for me and you are responsible for you.  We each can make our own decision.  I just wanted to share because people ask me why not.....so here's part of my answer.


Tuesday, October 22, 2013

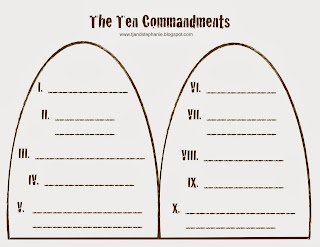
Ten Commandments

Learning the Ten Commandments, simply.


One is posted on the wall.  The other one is a fill in.  We are going to work on one per week, and write them all down once a week to get them in our brain.


Click here to download the file for yourself.

Enjoy learning the ten commandments.


Monday, October 21, 2013

Paper Snake- rehash

We've done this craft before but the kids wanted to do it again.  So here's a refresher.

Use a piece of cardstock.  Trace a small/medium size plate.
Start in the middle with a semi-circle, and continue staying the same distance away from your line making a swirl inside your circle.  Eventually you will run off the plate circle.
Draw two eyes, and color a fancy patter of any kind.  Next cut out the circle, then cut along the lines all the way to the middle and see how long your snake is!  Punch a hole and tie some string so you can hang it, or wave it in front of a fan.


Happy Crafting!


Sunday, October 20, 2013

Homemade Parachute for your toys

For whatever reason my kids think it's fun to get those little parachute army men.  Well however they string those little toys, they are ruined after one launch it seems.  
We made our own parachutes out of recycled bags from the stores.

First get a plastic bag from the store.  Lay it flat on the table.  Get a large bucket.  Trace a circle from the bucket onto the bag.  Cut out the circle.  Use some thin string, and cut four pieces about 12-16 inches long.  Tape all four pieces to the edge of the circle in what would be like a N, S, W, E pattern.
Tie the other four ends together.  Wrap around your own little action figure.  We wrapped it around his chest, and were able to launch him many times without it tangling so much.  I think we will be making these more often, as they are cheap and doesn't matter if they get ruined eventually. :)

See how big of an item you an launch, and what size of a parachute you need for it to fall nicely.

Have fun experiementing.


Saturday, October 19, 2013

Bending Light

This was from our Science book in our school work.
Watch how the light reflects in the water, and bends with the flow.

Take a tin can, clean it out, and poke a hole on the side towards the bottom.
Use a dark bathroom for the task.  Place your finger over the hole, and fill the can with water.
Use a large flashlight and shine down into the water.
Next shut off the lights, and let go of the water hole.  Watch the light reflect on the water that is shooting out of the hole in the can.  Pretty fun!


Friday, October 18, 2013

How a Windmill Functions

How a windmill works.

This is a fun little crafty experiment to show how a windmill functions.

Items you will need.

sticky tack (or clay)
straw
cardboard
2 clothes pins
string
button
bbq skewer


Cut a small piece of cardboard and place sticky tack on both ends.  Place the straw on the skewer.  Tie the string the button, and tape the other end of the string to the straw.  Cut a circle about 3" in diamter.  Punch a small hole in the exact middle of the circle, and cut from the edge toward the middle circle punch all the way around.  Then bend all the flaps the same direction to make it look like a windmill and the help it catch the breeze.  Place that on the straw.  Use more sticky tack if you need to, to help keep it in place on the straw.  Hold the skewer tight with the clothes pins, and stick into the sticky tack.

Test your windmill, and see for your self how wind power can be used to make machinery work!


Happy experimenting!


Yarn Art

No need for crayons or markers for this artwork.  You're going to use yarn!


Pick a shape, any shape.  Next glue the entire shape with a good amount of elmers liquid glue.  Then, fill in the shape with yarn, any color, and in any direction.   Make it 2D by adding another layer over top once your first layer dries.  Like is done with the fin on the fish.  This was the only color of yarn at the time, but we since went and bought more so we could make many more colorful creations with this fun craft idea!


Have fun!


Thursday, October 17, 2013

Water/Air Experiement

Can you tip a full to the brim cup of water over and not spill the water?
Let's see....


Use a plastic cup.
Make sure it is completely full to the BRIM!
You should be able to see the 'skin' of the water bubbling up a little.


Next use a semi-thick piece of cardboard.
Place on the cup making sure there is  no air gaps.
Continue holding it on tight while you flip the cup over.
Now, let go of the cardboard, but continue holding the cup upside down.

What happens?

It does not spill!
The air pressure on the bottom of the cardboard is causing a sucking type pressure to hold the cardboard in place.

How neat is that! :)

Eventually the water will spill out, so do this trick over a large bowl or bucket.

Happy experiementing.


Curled paper Pumpkin

First we cut out a pumpkin shape on cardstock.  Then cut small 1/2" strips of orange paper.  Curl it around a pencil.  Glue them onto your pumpkin cut out shape until its filled in.  Let dry and hang to enjoy!


You might also like these posts.

Related Posts Plugin for WordPress, Blogger...