Showing posts with label homeschool. Show all posts

Friday, September 26, 2014

Tracing

Another way to trace a picture.

We are used to putting the picture on the window and tracing it that way.  Now I wanted to introduce another way to trace something.  Through rubbing.

So we took a coloring book page, rubbed pencil all over the back of the page.


Then flipped it over and traced over the lines of the picture.  Now it rubbed the pencil marks from the backside onto the paper underneath.  Then we can trace over it again to make it darker, and color it. :)


I forgot to take a picture after he traced it to make it darker.  But if you enlarge it you can see the pencil marks that transferred through.  Fun experiment for the kids.


Wednesday, September 24, 2014

Painters Tape Art

This is something we did quite awhile ago, but I don't believe I shared with you all.

This is an easy craft that can be done in any shape.  Use painters tape to make the patter or picture you want.  Paint over then entire paper, painters tape and all.  When dry, remove the painters tape to reveal your picture.

Mine was an Easter Scene.

Make your own!


Monday, September 15, 2014

School Shelving

Organize it up right!

I have had mangled mismatched shelving with the homeschool books for a while now.  Things in all different closets or places.  I had this vision to utilize a wall in our schooling area.  First I was going to build the shelving into the wall.  Well we haven't technically finished that part of the basement yet, so that would be a pain to worry about later.  So instead I decided to make three shelves to cover most of the wall space but giving me flexibility to move them out or around easier if need be.

I figured my size, and how much wood I would need.  Went to Lowe's and asked them to cut all pieces I need.  They do this for free by the way.  So I waited a little while.  And went home with all my perfectly cut pieces of wood, and some screws.  Now just a little work on my part to screw them together and wha-la!  A beautiful shelving unit which puts all my books in one place.  Doesn't it feel great to get that all put together? :)


You can do it too!


Wednesday, September 10, 2014

Mosaics

In learning about the Roman culture, we made our own Mosaic pictures.

Cut 3/4" squares out of construction paper.  You pick the colors.  Draw a basic shape and fill in with the paper squares.  make sure not to over lap the colors for true mosaic effect.


Monday, April 14, 2014

Writing Fractions

Do you have a special needs child?  Maybe you can understand some of those easy things that you have to do again and again because your child just can't get it right.

My son is really smart when it comes to math.  Not when it comes to spelling.  So no matter how many times we work on spelling the numbers he has a hard time.

I try to make extra worksheets that he can use to practice the spellings without feeling like he is working on spelling.  Here's one of them.

Writing Fractions


Wednesday, October 30, 2013

English posters

I've decided we need more visuals in our school area.

Especially concerning English.

Noun, verb, adjective, adverb, pronoun....my kids are getting a little mixed up.

So here's some things I made for our walls, I'm sure I'll edit them as time goes by, but we are going to work with it for now.


Download them here.


Tuesday, October 22, 2013

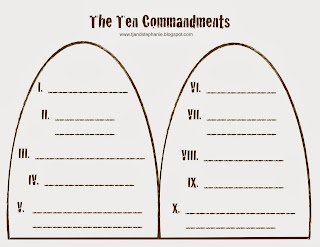
Ten Commandments

Learning the Ten Commandments, simply.


One is posted on the wall.  The other one is a fill in.  We are going to work on one per week, and write them all down once a week to get them in our brain.


Click here to download the file for yourself.

Enjoy learning the ten commandments.


Sunday, October 20, 2013

Homemade Parachute for your toys

For whatever reason my kids think it's fun to get those little parachute army men.  Well however they string those little toys, they are ruined after one launch it seems.  
We made our own parachutes out of recycled bags from the stores.

First get a plastic bag from the store.  Lay it flat on the table.  Get a large bucket.  Trace a circle from the bucket onto the bag.  Cut out the circle.  Use some thin string, and cut four pieces about 12-16 inches long.  Tape all four pieces to the edge of the circle in what would be like a N, S, W, E pattern.
Tie the other four ends together.  Wrap around your own little action figure.  We wrapped it around his chest, and were able to launch him many times without it tangling so much.  I think we will be making these more often, as they are cheap and doesn't matter if they get ruined eventually. :)

See how big of an item you an launch, and what size of a parachute you need for it to fall nicely.

Have fun experiementing.


Saturday, October 19, 2013

Bending Light

This was from our Science book in our school work.
Watch how the light reflects in the water, and bends with the flow.

Take a tin can, clean it out, and poke a hole on the side towards the bottom.
Use a dark bathroom for the task.  Place your finger over the hole, and fill the can with water.
Use a large flashlight and shine down into the water.
Next shut off the lights, and let go of the water hole.  Watch the light reflect on the water that is shooting out of the hole in the can.  Pretty fun!


Friday, October 18, 2013

How a Windmill Functions

How a windmill works.

This is a fun little crafty experiment to show how a windmill functions.

Items you will need.

sticky tack (or clay)
straw
cardboard
2 clothes pins
string
button
bbq skewer


Cut a small piece of cardboard and place sticky tack on both ends.  Place the straw on the skewer.  Tie the string the button, and tape the other end of the string to the straw.  Cut a circle about 3" in diamter.  Punch a small hole in the exact middle of the circle, and cut from the edge toward the middle circle punch all the way around.  Then bend all the flaps the same direction to make it look like a windmill and the help it catch the breeze.  Place that on the straw.  Use more sticky tack if you need to, to help keep it in place on the straw.  Hold the skewer tight with the clothes pins, and stick into the sticky tack.

Test your windmill, and see for your self how wind power can be used to make machinery work!


Happy experimenting!


Yarn Art

No need for crayons or markers for this artwork.  You're going to use yarn!


Pick a shape, any shape.  Next glue the entire shape with a good amount of elmers liquid glue.  Then, fill in the shape with yarn, any color, and in any direction.   Make it 2D by adding another layer over top once your first layer dries.  Like is done with the fin on the fish.  This was the only color of yarn at the time, but we since went and bought more so we could make many more colorful creations with this fun craft idea!


Have fun!


Thursday, October 17, 2013

Water/Air Experiement

Can you tip a full to the brim cup of water over and not spill the water?
Let's see....


Use a plastic cup.
Make sure it is completely full to the BRIM!
You should be able to see the 'skin' of the water bubbling up a little.


Next use a semi-thick piece of cardboard.
Place on the cup making sure there is  no air gaps.
Continue holding it on tight while you flip the cup over.
Now, let go of the cardboard, but continue holding the cup upside down.

What happens?

It does not spill!
The air pressure on the bottom of the cardboard is causing a sucking type pressure to hold the cardboard in place.

How neat is that! :)

Eventually the water will spill out, so do this trick over a large bowl or bucket.

Happy experiementing.


Curled paper Pumpkin

First we cut out a pumpkin shape on cardstock.  Then cut small 1/2" strips of orange paper.  Curl it around a pencil.  Glue them onto your pumpkin cut out shape until its filled in.  Let dry and hang to enjoy!


Wednesday, October 16, 2013

Pumpkin Craft

Pumpkins


Cut paper into 1 inch strips.  Make 2 small circles.  Tape the strips to the circle for the bottom.  Bring them up and tape them to the circle for the top.  This makes your pumpkin shape.  Roll up a 2" strip of green paper, tape or glue it together.  Then tape or glue it to the top of your pumpkin.  Make all sorts of sizes with different lengths and thicknessess of your construction paper.


Happy Crafting!


Wednesday, June 5, 2013

My Own Recipes

Call it Home Ec., or just fun.  I let the kids experiment with food and recipes.

I said they could make up whatever ingredients they wanted.
Rules.
1. Must be somewhat reasonable,
2. Must be ingredients we have,
3. Must be written down and thought through.

Daddy was the lucky winner to try these lovely recipes.

So here we go.... Bear's idea.
chocolate graham crackers, chocolate chips, marshmallows, and cut up rhubarb.  Cook in the microwave for 2 minutes.


Monkey's idea.
regular graham crackers, 1/4 and apple, 2 sticks of rhubarb, cinnamon and sugar.  Bake at 350 for 13 minutes.


Guess which one Daddy liked the best.


Well, I'm not going to tell you until you guess.


You might also like these posts.

Related Posts Plugin for WordPress, Blogger...