Monday, September 29, 2014

Organization- Junk Drawer

I will admit I have to do this every once in a while.  All kinds of people dig in here and throw stuff in without placing it nicely in there.  So this time I added some extra tupperware dishes that I don't use that much.  I would have used some small boxes if I had some...maybe I will replace the tupperware with boxes if I get get small boxes that size.

Anyway....check it out....


Messy version=annoying


New version with little compartments=much better!

 1 little compartment for small devices, box cutters, tape measurers, pliers, one for sticky notes and scrap paper, one for little flash lights, one for school/office supplies like paper clips, tape, mini stapler etc, one compartment for batteries.  Nice to not have all the little things just rolling around everywhere.


Ahhh...now I don't have to be so frustrated every time I open this drawer.


Friday, September 26, 2014

Tracing

Another way to trace a picture.

We are used to putting the picture on the window and tracing it that way.  Now I wanted to introduce another way to trace something.  Through rubbing.

So we took a coloring book page, rubbed pencil all over the back of the page.


Then flipped it over and traced over the lines of the picture.  Now it rubbed the pencil marks from the backside onto the paper underneath.  Then we can trace over it again to make it darker, and color it. :)


I forgot to take a picture after he traced it to make it darker.  But if you enlarge it you can see the pencil marks that transferred through.  Fun experiment for the kids.


Wednesday, September 24, 2014

Painters Tape Art

This is something we did quite awhile ago, but I don't believe I shared with you all.

This is an easy craft that can be done in any shape.  Use painters tape to make the patter or picture you want.  Paint over then entire paper, painters tape and all.  When dry, remove the painters tape to reveal your picture.

Mine was an Easter Scene.

Make your own!


Monday, September 22, 2014

Minecraft Poster Make Your Own!

Minecraft is all the rage at the moment.

My son wanted to have a minecraft birthday party.  So I let the kids make their own minecraft poster.  I searched online for the minecraft pictures.  Printed them out and had the kids cut and paste to make their own picture.

Make your own creation on paper!


Friday, September 19, 2014

Appetizers GF

Want to put a fun twist on those gluten free appetizers?

Check out these little diddies I made for a ladies event.

 Take a slice of ham, put a little mayo on it, add a small cube of cheese if desired then wrap it up in a long and thinly sliced, cucumber slice.  Nice bite size gluten free appetizer (sandwich).

 For this one, I used cracked pepper turkey, a little dab of mayo, and a pepperoncini all wrapped up in a long thin cucumber slice.


Lastly, I chose hard salami, cut it in half and wrapped it around a baby pickle.  Gedney since they are dye free. :)  Great little bite-size treats.


Wednesday, September 17, 2014

Recycled FORT!

We have had these left over fence panel pieces in our backyard for 5 years.  For all these years we have witnessed our children playing with it even after repeatedly telling them not too.

Finally I decided it had to go.  But first, we had some fun with it.

New neighbors moved in, and we became the hang out.  I said if we are going to be the 'spot' and you are all going to be playing with the wood, trying to build small forts, than lets just build a REAL FORT!

So we all got to work.  The kids took turns ripping the wood fence panels apart, carefully, and taking out the nails.


Then I made the wall frames.

Then we put those walls together to make the frame of the fort.

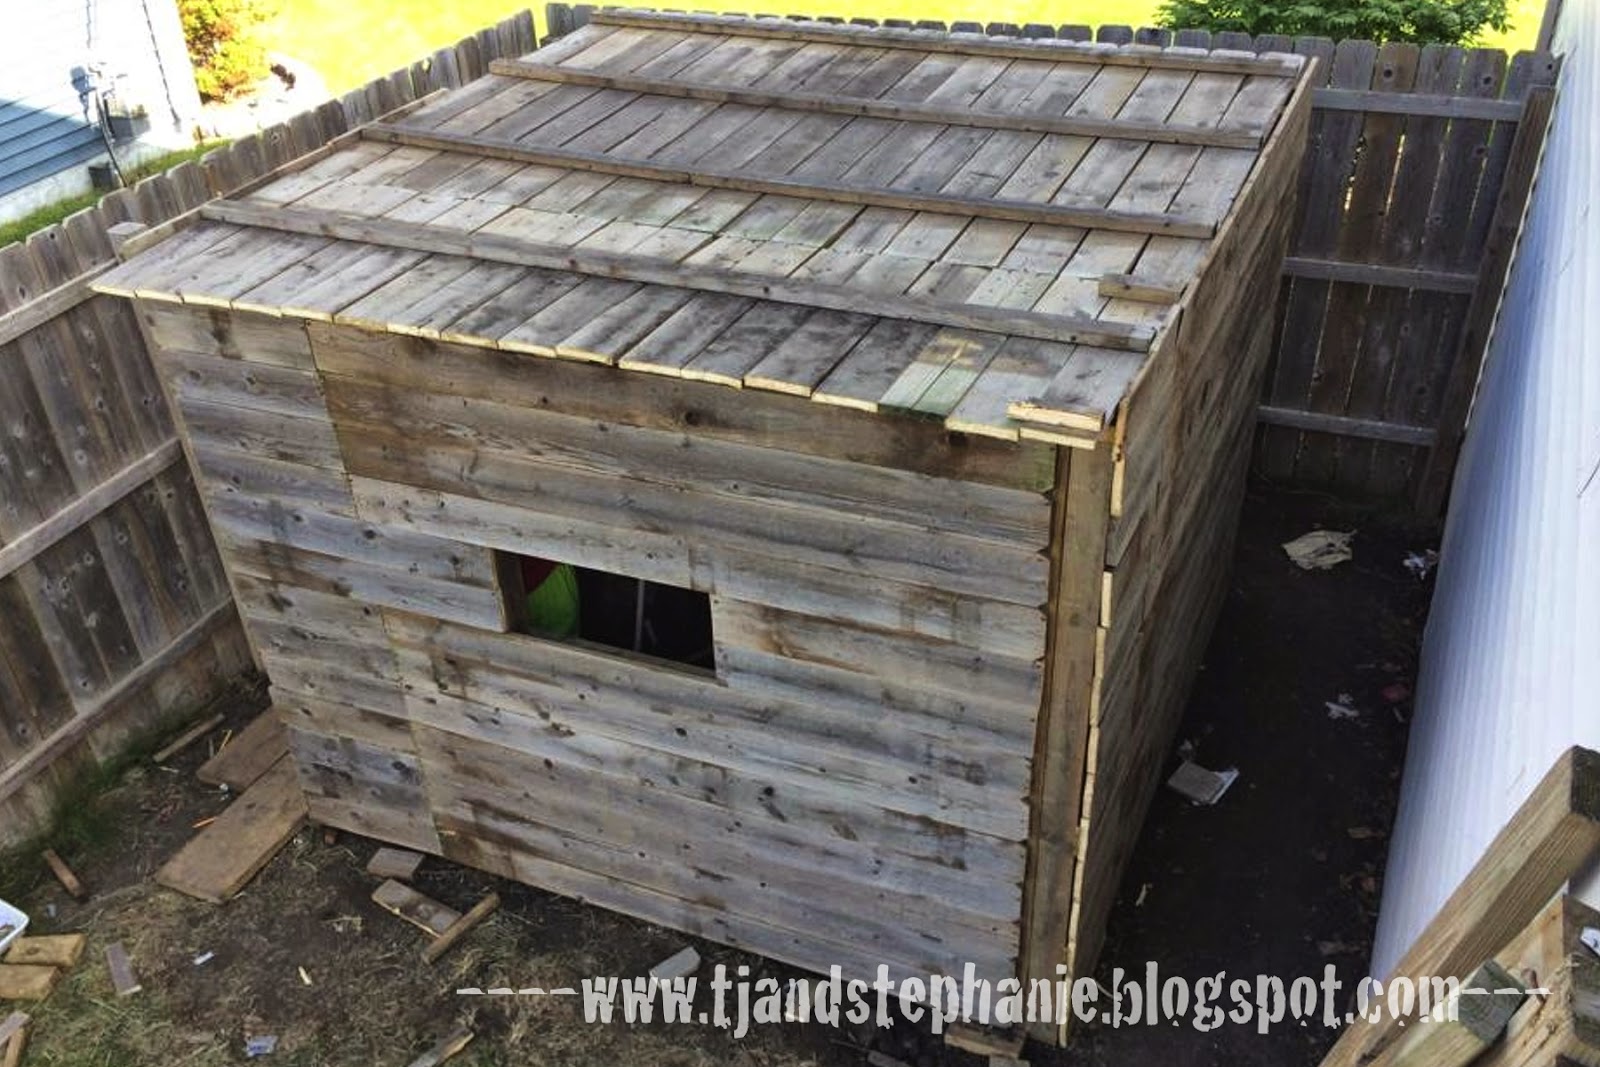
Next we took each of those fence boards that they had removed and used them for the siding!

Then we placed an entire fence panel on the top for the roof of the fort.

And lastly we added doors.  One big door, and a small trap/secret back door.


Recycling!  Then we were finally able to throw out all the other pieces and get rid of the pile!


Monday, September 15, 2014

School Shelving

Organize it up right!

I have had mangled mismatched shelving with the homeschool books for a while now.  Things in all different closets or places.  I had this vision to utilize a wall in our schooling area.  First I was going to build the shelving into the wall.  Well we haven't technically finished that part of the basement yet, so that would be a pain to worry about later.  So instead I decided to make three shelves to cover most of the wall space but giving me flexibility to move them out or around easier if need be.

I figured my size, and how much wood I would need.  Went to Lowe's and asked them to cut all pieces I need.  They do this for free by the way.  So I waited a little while.  And went home with all my perfectly cut pieces of wood, and some screws.  Now just a little work on my part to screw them together and wha-la!  A beautiful shelving unit which puts all my books in one place.  Doesn't it feel great to get that all put together? :)


You can do it too!


Friday, September 12, 2014

Measure UP!

When I was growing up my mom marked how tall we were throughout the years.  It was a fun thing to do.  However, now that the time is here where she is planning to move out of my childhood home, how is she going to preserve all those measurements that we wrote on the door jam between the kitchen and the dining room.


Well, I decided to measure up my kids in a more 'move friendly' manner.

Check it out!

Get a 1x4x8 board at your local store.
Measure out your markings with a pen, or marker.  Start measure your children on this board.

Mine fit perfectly in the hallway by the bedroom or bathroom door.  The ceiling is 8 feet tall so I didn't even have to screw it in to the wall.  Now we will always be able to bring this piece with us if we ever need to move.

Enjoy!


Thursday, September 11, 2014

Kid creations

Monkey decided he wanted to make his own checkers board.  We looked up the size, and it fit perfectly on his lego flat board.  Check it out. :)


Wednesday, September 10, 2014

Mosaics

In learning about the Roman culture, we made our own Mosaic pictures.

Cut 3/4" squares out of construction paper.  You pick the colors.  Draw a basic shape and fill in with the paper squares.  make sure not to over lap the colors for true mosaic effect.


You might also like these posts.

Related Posts Plugin for WordPress, Blogger...